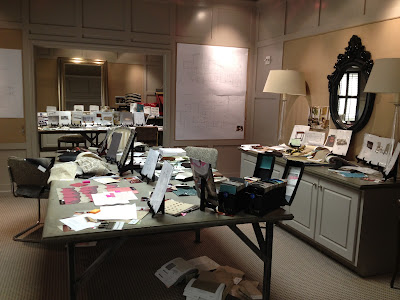
I can't believe seven weeks have already gone by. It seems like yesterday that I was just starting my internship at
Pineapple House! It has been such a valuable learning experience and a wonderful introduction to the Interior Design industry. That being said, lets get on to the exciting stuff. The install!
Without going into too much detail about the client, I will say that this home was on a very grand scale. I will let this picture speak for itself.
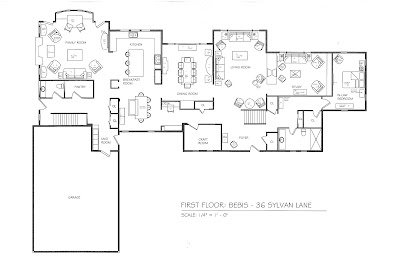
Prior to the install, I was given the task to visit the client and retrieve some family portraits that were to be framed and take photos of some of the statues that the client owned. However, on that first visit, I only got a glimpse of the interior so I was excited to see the rest of the home. On this install, the focus was only on certain rooms, such as the living room, dining room, two bedrooms and the basement (terrace level in design terms). The whole house would be installed in phases and this was just phase one.
The install started on Monday, but I didn't have to be there until Wednesday since the first step was moving in the furniture and placing it. Similar to the other install, the painting and wall finishes had already been completed, so our job was to stage the home. Day one involved un-boxing all the accessories and lamps. Due to the fact that most of the pieces had to be moved by the moving team, there wasn't much for me and Amanda (the other intern/partner in crime) to do. So we were sent out to shop for necessities such as towels, bath mats, and lamp options. I have to say, my little CR-V has come in quite handy during this install as I have been able to fit a lot of items in the trunk. Day two was about the same as day one, including another shopping adventure. Once day three arrived, the whole team was making a dash to the finish line since the client walk-through was that evening. Amanda and I teamed up, arranging bookshelves, replacing knobs, and vacuuming. Another task that we completed was placing all of the lightbulbs in lamps, placing extensions cords, and concealing the cords.
The last day can be a bit tedious as we had to go into each room and remove all the price stickers on items. We then placed them on a sheet of paper and wrote down what the item was. This is done so that in the case that the client does not want to keep an item, we can put the sticker back on and return it to the store. Invoicing is also another task that must be done before the walk-through. In order to help with this process, pictures are taken of anything and everything that we installed in the home. This means that we take pictures of all the bookshelves, making sure to capture each accessory placed.
Enough with the explanations, right? Let's get to the photos!
 |
| Terrace level Hallway. |
 |
| Billiards room. |
 |
| Smoking lounge. |
 |
| Skull collection above mantel in Smoking Lounge. |
 |
| View of the backyard oasis. |
 |
Terrace level hangout.
Yes, that is six TVs connected to make one large screen. |
 |
| Terrace level game room. |
 |
| Wet bar. |
 |
| The Great Room. |
 |
| The Dining Room. |
 |
| Clever banquettes in the Dining Room. |
 |
| The gorgeous Living Room. |
 |
| Lovely pink chair in Her Office. |
 |
The Family Room.
Only the bookshelves and art piece were new. |
 |
| His Study. |
 |
| Masculine seating area in the Study. |
 |
| The Foyer. |
 |
| The Foyer Vestibule. |
 |
Stairs leading up to the second floor.
I love the starburst mirrors lining the stairway. |
 |
| One of the little girls' bedrooms. |
 |
| Love the exposed beams! |
 |
| The other bedroom. |
 |
| The pink and chevron were such fun elements! |
After a very exciting and exhausting week, it was so fulfilling to see the project completed! I think the space was truly transformed. I couldn't have imagined a better way to end such a fabulous internship.


